

Progress Chef Automate is an enterprise platform that allows developers, operations and security engineers to collaborate and deliver application and infrastructure changes more effectively. As software deployment speed increases across the organization, consistent real-time collaboration with high availability (HA) becomes critical. Chef Automate facilitates this collaboration by allowing different teams to accomplish various tasks simultaneously through the interface.
Chef Automate provides tools for local development and integration points, including APIs, software development kits (SDKs) and deployment pipelines that support typical workflows.
What is High Availability?
HA refers to a system or application offering high operational availability. This means the entire site or application will not be down if one server goes down due to traffic overload or other issues. HA implies that the application remains available with zero interruption. HA is achieved when an application continues to operate, even when one or more underlying components fail.
Thus, HA is designed to avoid loss of service by reducing failures and minimizing unscheduled downtimes caused by power outages or component losses.
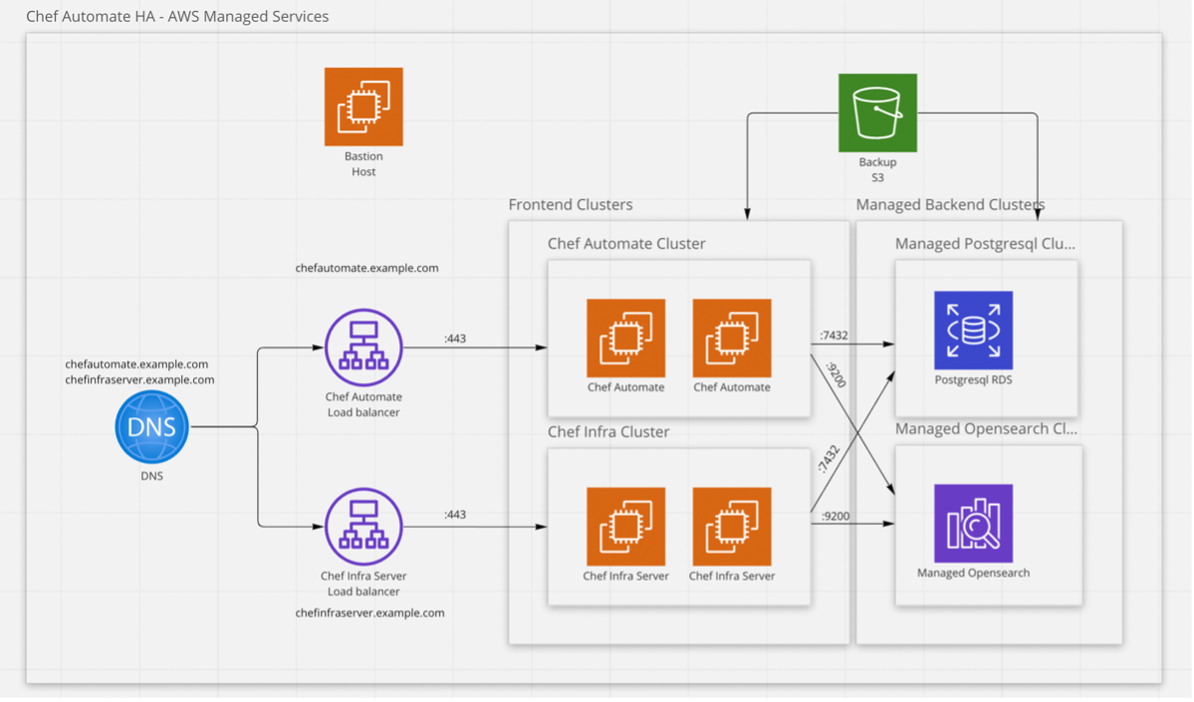
In this blog, we learned about installing Chef Automate HA in detail. We will look at the concepts of OpenSearch, PostgreSQL, Bastion host and VPC with their detailed installation and configuration steps concerning Automate HA for AWS Managed Services.
Prerequisites:
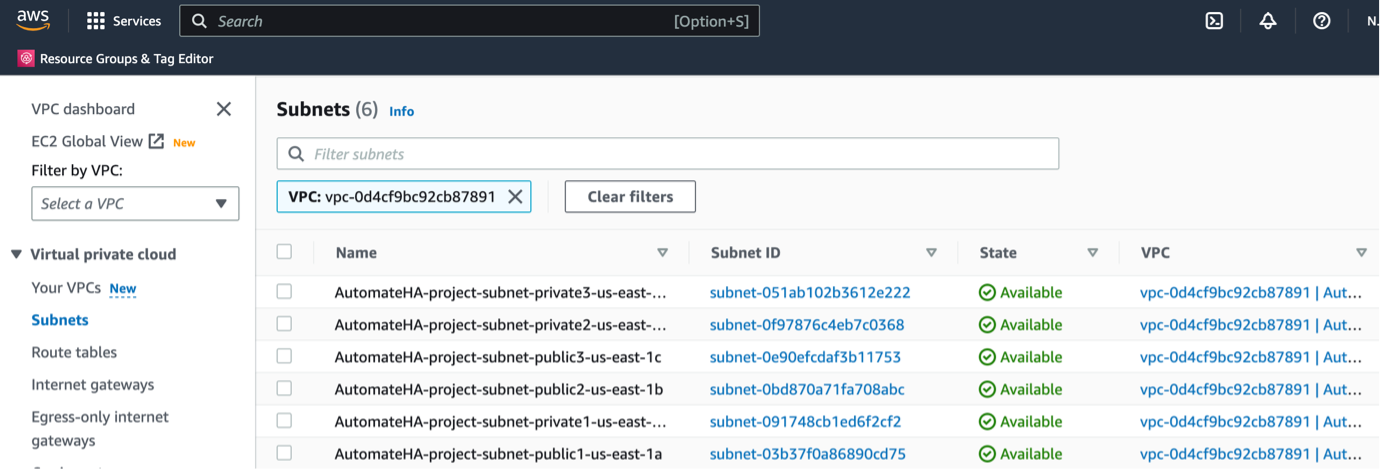
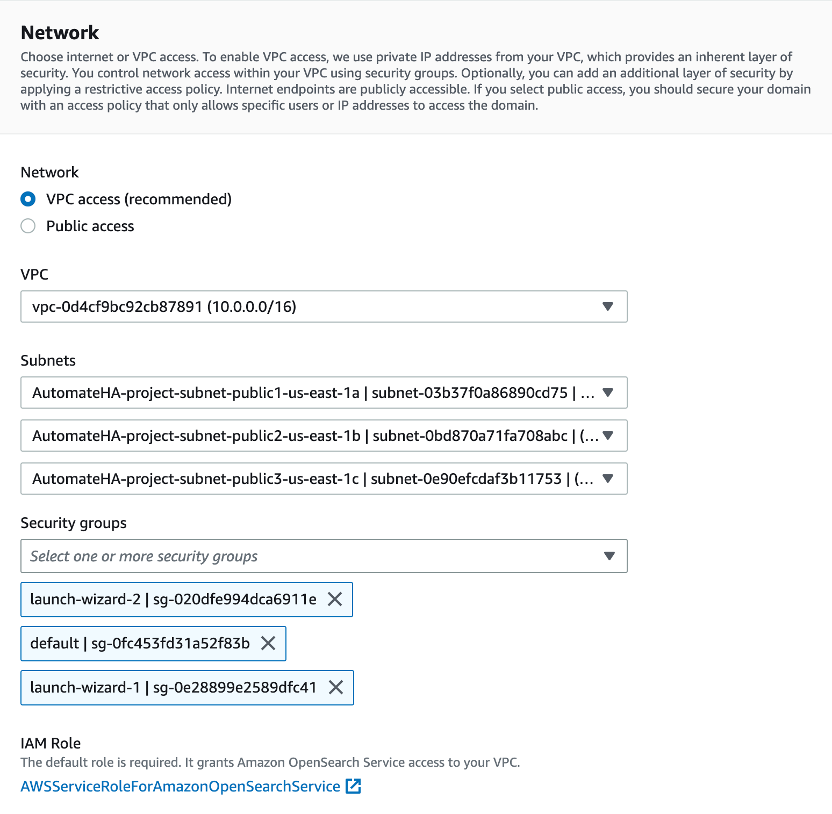
o Three private subnets
o Three public subnets
o AWS RDS PostgreSQL: Version 13.5
• NoSQL Database:
o AWS OpenSearch: Version 1.3
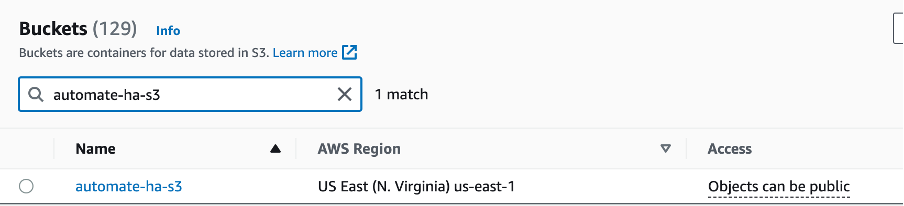
• AWS S3 bucket
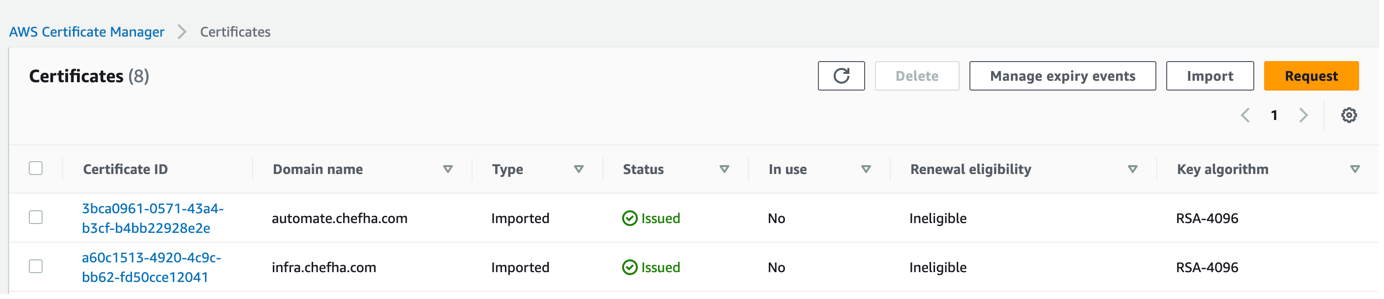
• AWS credentials certificates:
o Infra
o Automate
Setting up your AWS Infrastructure
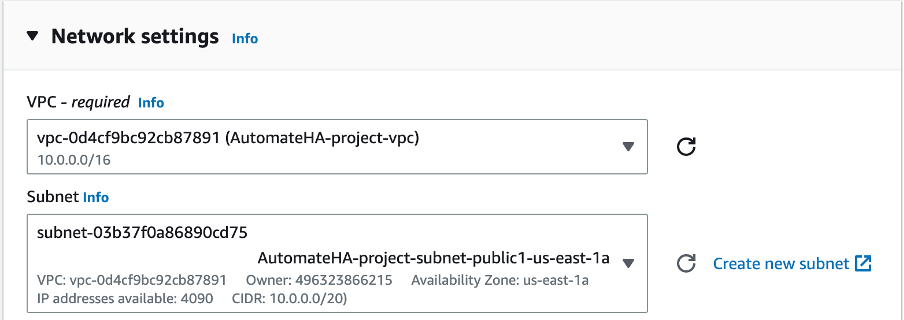
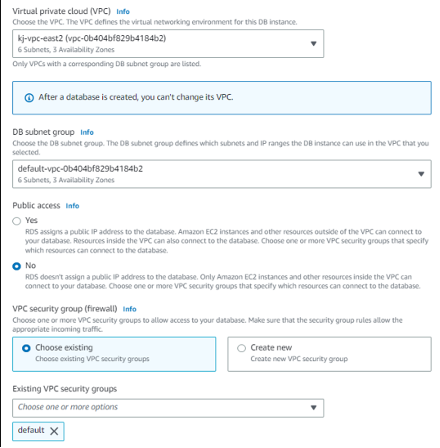
Virtual Private Cloud (VPC)
Certificates
Here, we have used a self-signed certificate for easier understanding.
Amazon S3 bucket
Learn more information on Backup and Restore with Managed Service.
Identity and Access Management (IAM)
o AdministratorAccess
Learn more about creating IAM Users.
Bastion Host
o Select the VPC created during the first step
o Select the public subnet
o Increase the Root volume equal to or greater than 140GB

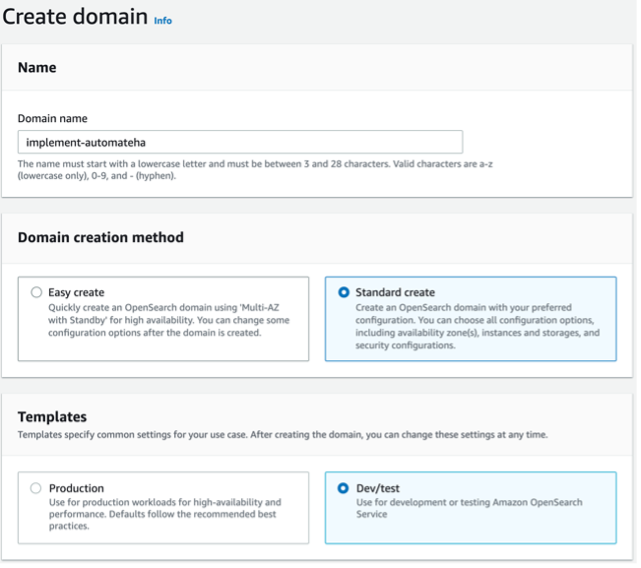
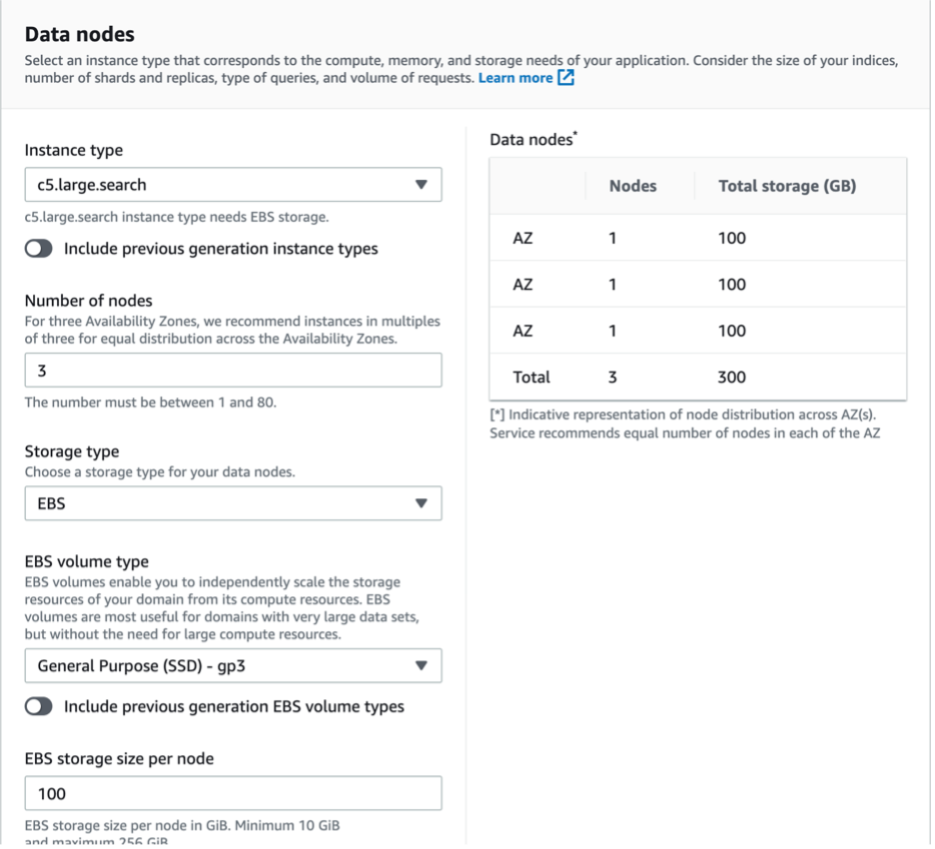
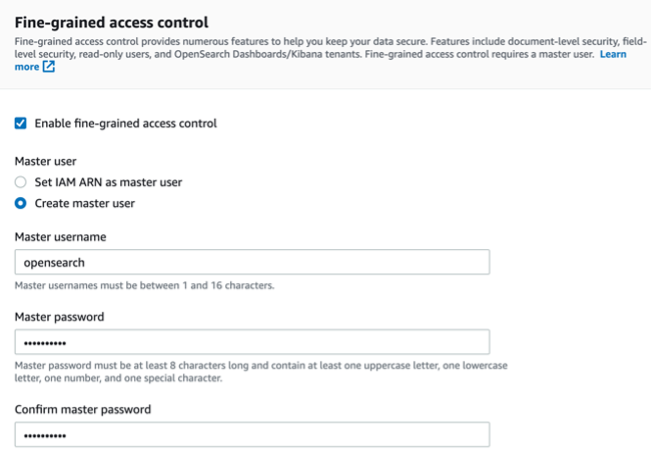
Setting up OpenSearch
o Make sure to select Allow under Action
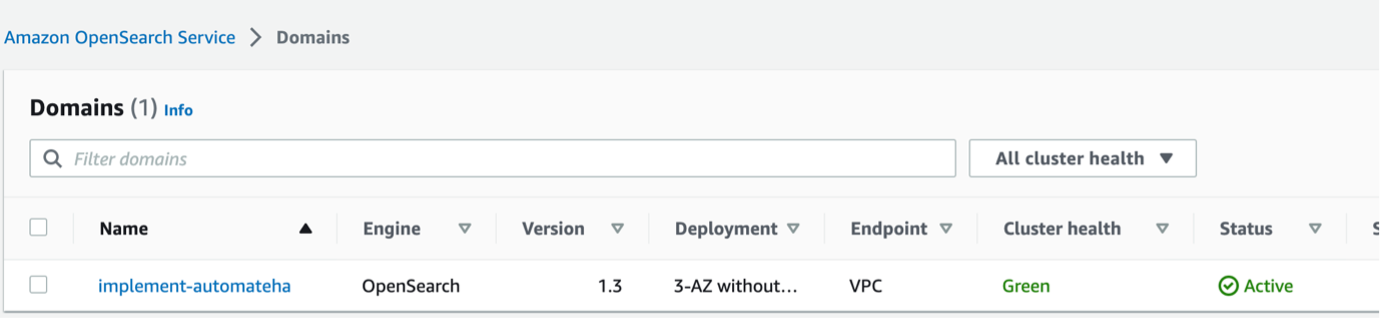
You can confirm your OpenSearch installation by checking the Cluster health.
If you have trouble accessing OpenSearch UI, you need to configure external OpenSearch.
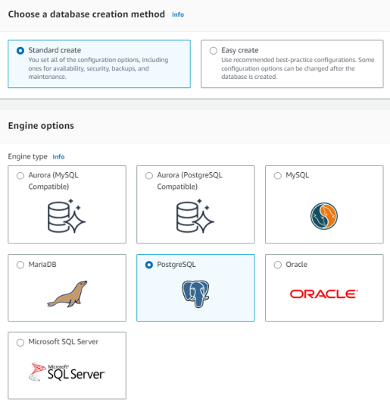
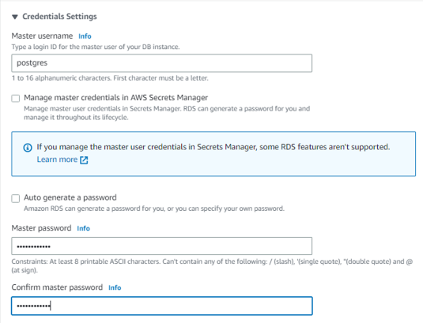
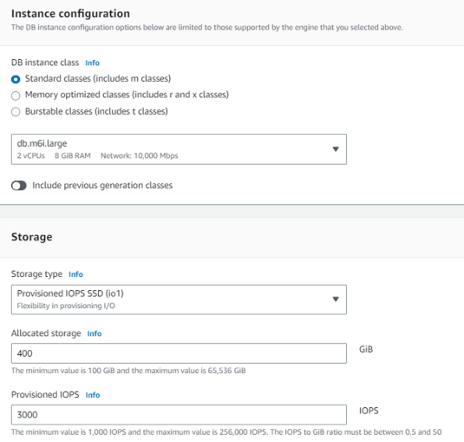
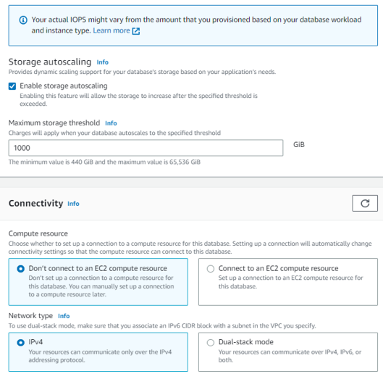
Setting Up RDS
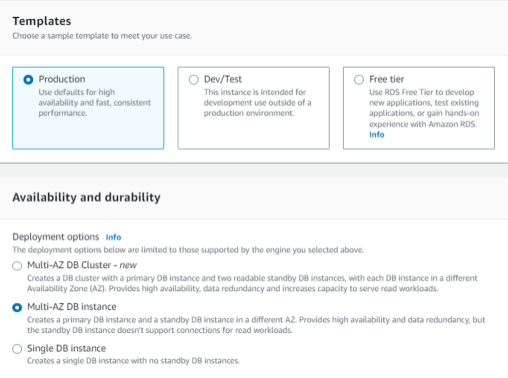
You can confirm your RDS installation with the status sign (Available)
Automate HA Setup
$ curl https://packages.chef.io/files/current/latest/chef-automate-cli/chef-automatelinuxamd64.zip \ | gunzip - > chef-automate && chmod +x chef-automate \ | cp -f chef-automate /usr/bin/chef-automate
The previous commands will download the Latest Automate CLI
$ curl https://packages.chef.io/airgap_bundle/current/automate/latest.aib -o automate.aib
The previous command will download the Latest Airgapped Bundle.
$ chef-automate config gen config.toml
The previous command will generate config.toml
You can also generate a configuration file using the init-config subcommand.
$ chef-automate init-config-ha aws
$ mkdir -p ~/.aws echo "[default]" >> ~/.aws/credentials echo "awsaccesskeyid=AKIAXHDZVFZXXXXXXX" >> ~/.aws/credentials echo "awssecretaccesskey=n8x1hYXXXXXXXGg6PIKXPy5eM0X/Tn" >> ~/.aws/credentials
Note: You can also assign the bastion host with the IAM roles. If you choose to assign the role via the above command, you might need to restart the instance.
Upload your SSH key Pair to Bastion Machine and note down the file's path. Your config.toml file will reference this later.
Update config.toml file with all the relevant details.
Config.toml
o Give ssh_user - Which has access to all the machines.
Example: ubuntu
o ssh_group_name - Make sure the given group name is available in all machines. This value will default to sshuser.
Example: ubutnu
o Give ssh_port - If your AMI runs on a custom ssh port. The default value is 22.
Example: 22
o Give ssh_key_file path - Downloaded from AWS SSH Key Pair, which you want to use to create all the VMs. This will let you access all the VMs.
Example: /tmp/xyz-automate.pem
o Set backup_config to "s3" or efs
Example: s3
If backup_config is s3, uncomment and set the value for the following s3bucketName attribute to your bucket name. If the bucket name does not exist, it will be created for you automatically.
o Set admin_password to access Chef Automate UI for user admin.
Example: Admin2Admin
o Don’t set fqdn for the AWS deployment.
o Set instance count for Chef Automate.
Example: 1
o Set instance count for Chef server.
Example: 1
o Set instance count for OpenSearch.
Example: 0
o Set instance count for PostgreSQL.
Example: 0
o Set profile. The default value of the profile is "default."
Example: default
o Set region. The default value of the region is "us-east-2."
Example: us-east-2
o Set awsvpcid, created in the Prerequisites step.
Example: "vpc741sac4c".
o Set awscidrblockaddr
Example: 172.31.0.0
o If AWS VPC uses Subnet, set private_custom_subnets to the three private subnets we created in the prerequisites step and public_custom_subnets to the three public subnets we created in the prerequisites step.
Example: private_custom_subnets = ["subnet-XXXXXX", "subnet-XXXXX", "subnet-XXXXX"]
Example: public_custom_subnets = ["subnet-XXXXXX", "subnet-XXXXX", "subnet-XXXXX"]
o Set ssh_key_pair_name, an SSH Key Pair created as a prerequisite. The pair value should be the name of the AWS SSH Key Pair without a .pem extension. The ssh key content should be the same as the content of the sshkeyfile.
Example: akshay-automate
o Set setup_managed_services, as these deployment steps are for Managed Services AWS Deployment. The default value is false.
Example: true
o Set managed_opensearch_domain_name
Example: implement-automate-ha-os
o Set managed_opensearch_domain_url
Example: vpc-implement-automate-741sac4c.us-east-2.us.amazonaws.com
o Set managed_opensearch_username
Example: opensearch
o Set managed_opensearch_user_password
Example: Admin1234!
o Set managed_rds_instance_url
Example: database-1.c45gjxdw181u5.us-east-2.rds.amazonaws.com:5432
o Set managed_rds_superuser_username
Example: Postgres
o Set managed_rds_superuser_password
Example: Admin1234!
o Set managed_rds_dbuser_username
Example: Postgres
o Set managed_rds_dbuser_password
Example: Admin1234!
o Set the ami_id value, which depends on the AWS Region and the Operating System image you want to use.
Example: ami-05147510eb2885c8
o Set Instance Type for automate_server_instance_type
Example: m5.large
o Set Instance Type for chef_server_instance_type
Example: m5.large
o Set opensearch_server_instance_type
Example: m5.large
o Set postgresql_server_instance_type
Example: m5.large
o Set automate_lb_certificate_arn with the arn value of the Certificate created in AWS ACM for the DNS entry of chefautomate.example.com
Example: arn:aws:acm:us-east-2:155397717:certificate/XXXXXX
o Set chef_server_lb_certificate_arn with the arn value of the Certificate created in AWS ACM for the DNS entry of chefinfraserver.example.com
Example: arn:aws:acm:us-east-2:155397717:certificate/XXXXXX
o Set automate_ebs_volume_iops
Example: 100
o Set automate_ebs_volume_size
Example: 50
o Set automate_ebs_volume_type
Example: gp2
o Set chef_ebs_volume_iops
Example: 100
o Set chef_ebs_volume_size
Example: 50
o Set chef_ebs_volume_type
Example: gp2
o Set opensearch_ebs_volume_iops
Example: 100
o Set opensearch_ebs_volume_size
Example: 50
o Set opensearch_ebs_volume_type
Example: gp2
o Set postgresql_ebs_volume_iops
Example: 100
o Set postgresql_ebs_volume_size
Example: 50
o Set postgresql_ebs_volume_type
Example: gp2
o X-Contact = [email protected]
o X-Dept = “TPMM”
o X-Project = “AutomateHA”
Save the config.toml file.
Run the following command as sudo.
$ chef-automate provision-infra config.toml --airgap-bundle automate.aib
The above command will provision “automate.aib” with the set “config.toml” file.
$ chef-automate verify config –c config.toml
The above command will check for any misconfiguration in the config.toml file.
$ chef-automate deploy config.toml --airgap-bundle automate.aib
The above command will deploy “automate.aib” with set “config.toml” file.
Check the status of the Automate HA services, by running the following command:
$ chef-automate status summary
Get all the information about the deployment of Automate HA, by running the following command:
$ chef-automate info
Access the credentials file, by running the following command:
$ sudo cat automate-credential.toml
